
Flower Printing DIY
a simple early fall project by Katie J. Wensink for Clearline Magazine

It’s officially fall! While this season brings about lots of exciting changes (hello, thrifted wool sweaters!), it also brings an end to our summer flowers. I’ve been gardening for a few years now and decided that looking back at photos of my lush blooms wasn’t going to cut it anymore, I wanted something more permanent and tangible to remember them by. That bring us to today’s DIY project! Flower printing.
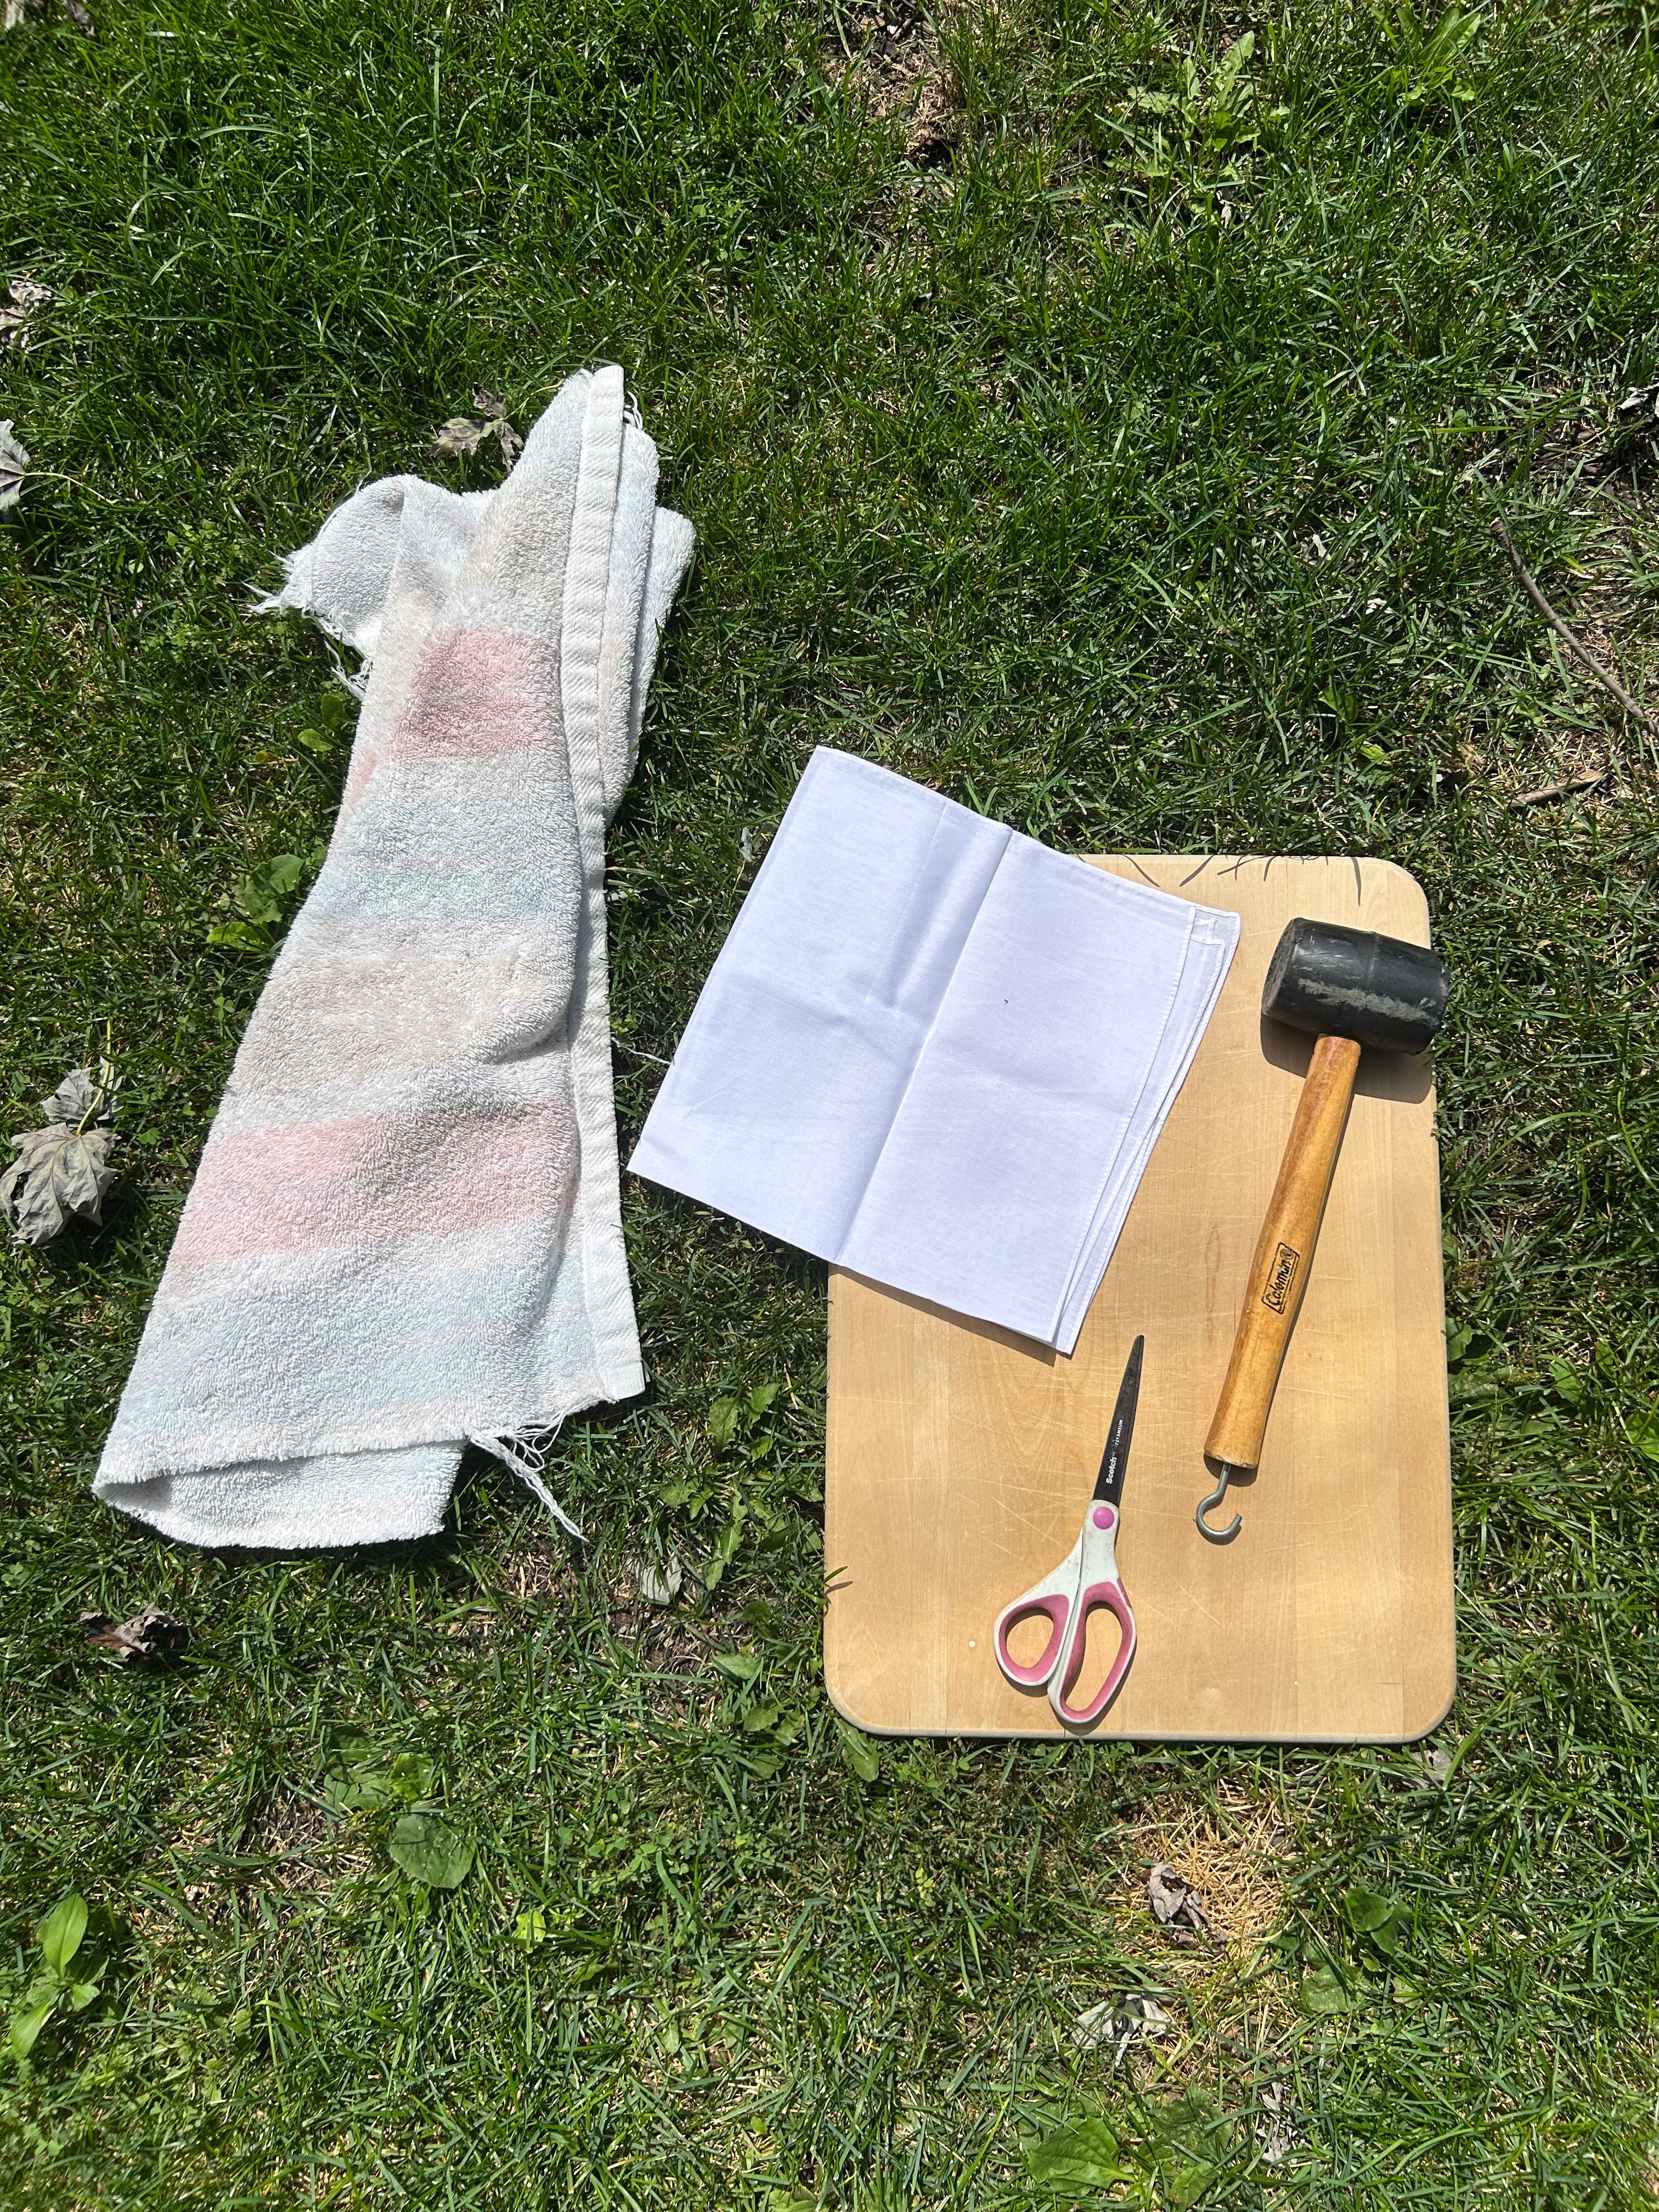
You will need:
- a rubber mallet
- a 100% cotton or linen piece of fabric (I used cotton tea towels)
- flower and leaf cuttings
- a rag or old towel that is not precious to you
- a hard surface (I used a wooden cutting board)
Step 1: Prepare your workstation by laying your fabric over your surface and gathering plant cuttings you wish to transfer.
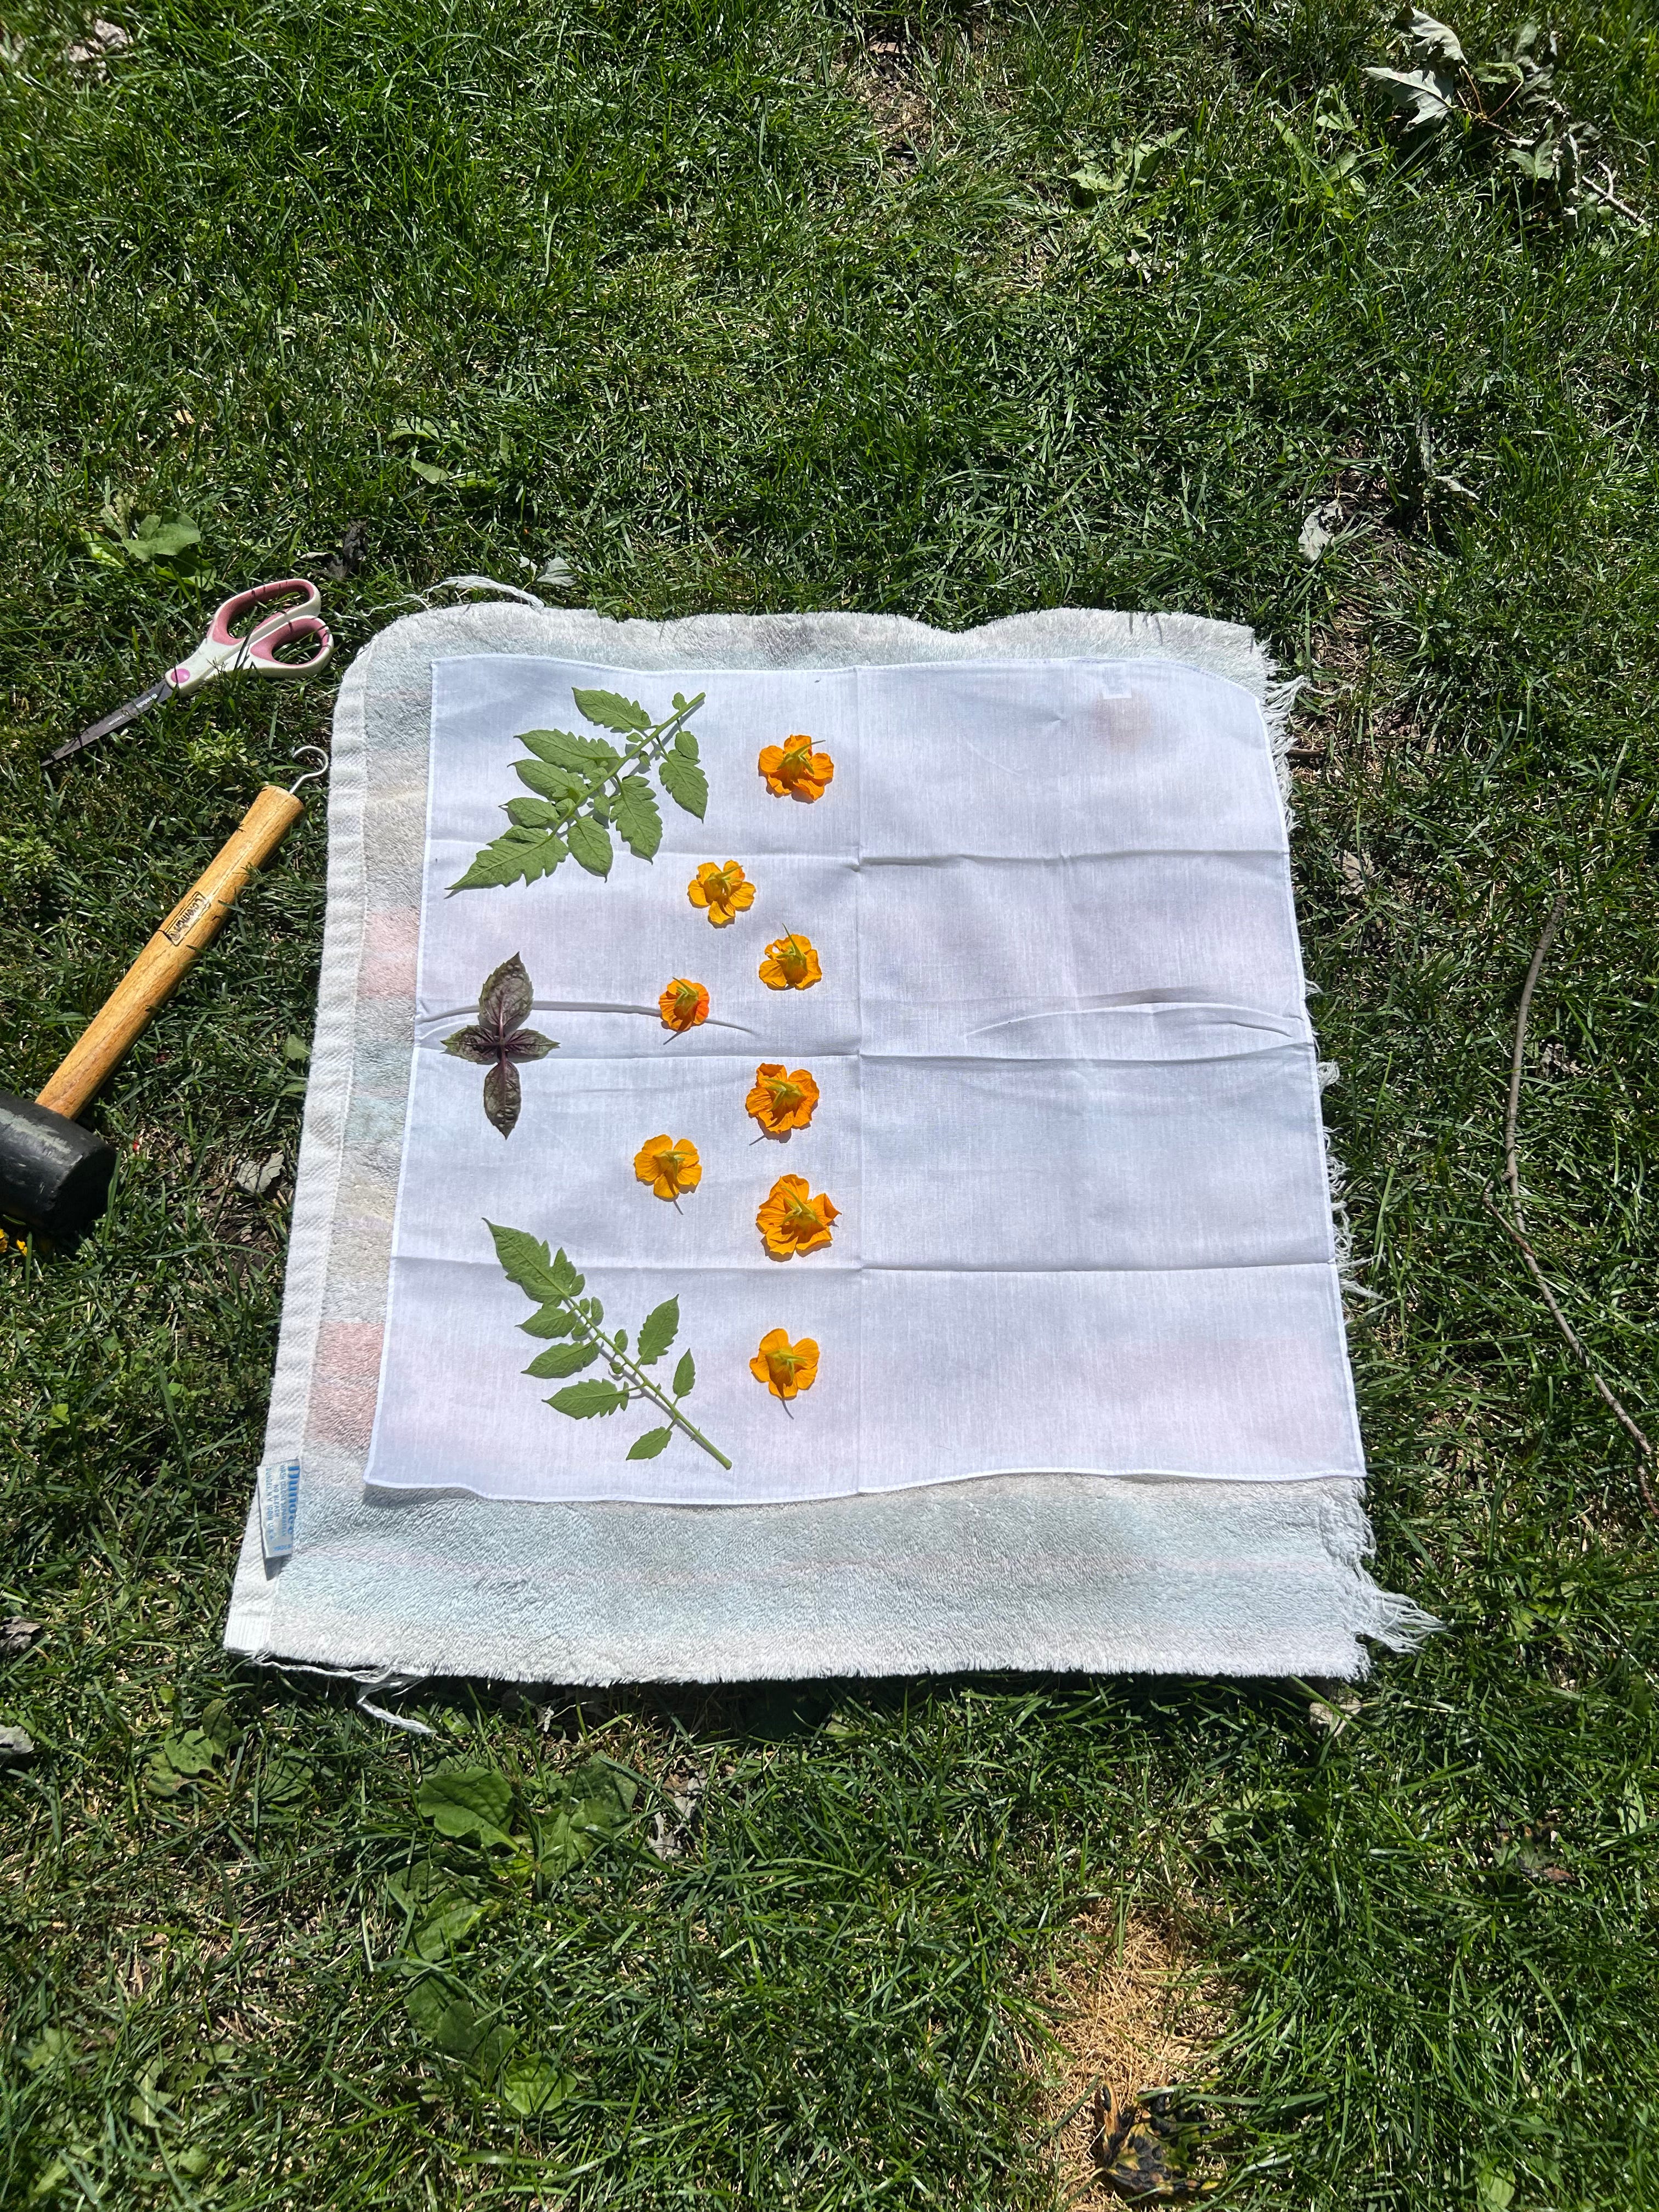
Step 2: Arrange your cuttings..
-on either one side of your fabric, folding the fabric in half so the pressed plant cuttings transfer to both sides. Cover with your rag. (This is what I did!)
-or over the whole fabric, then covering with your rag
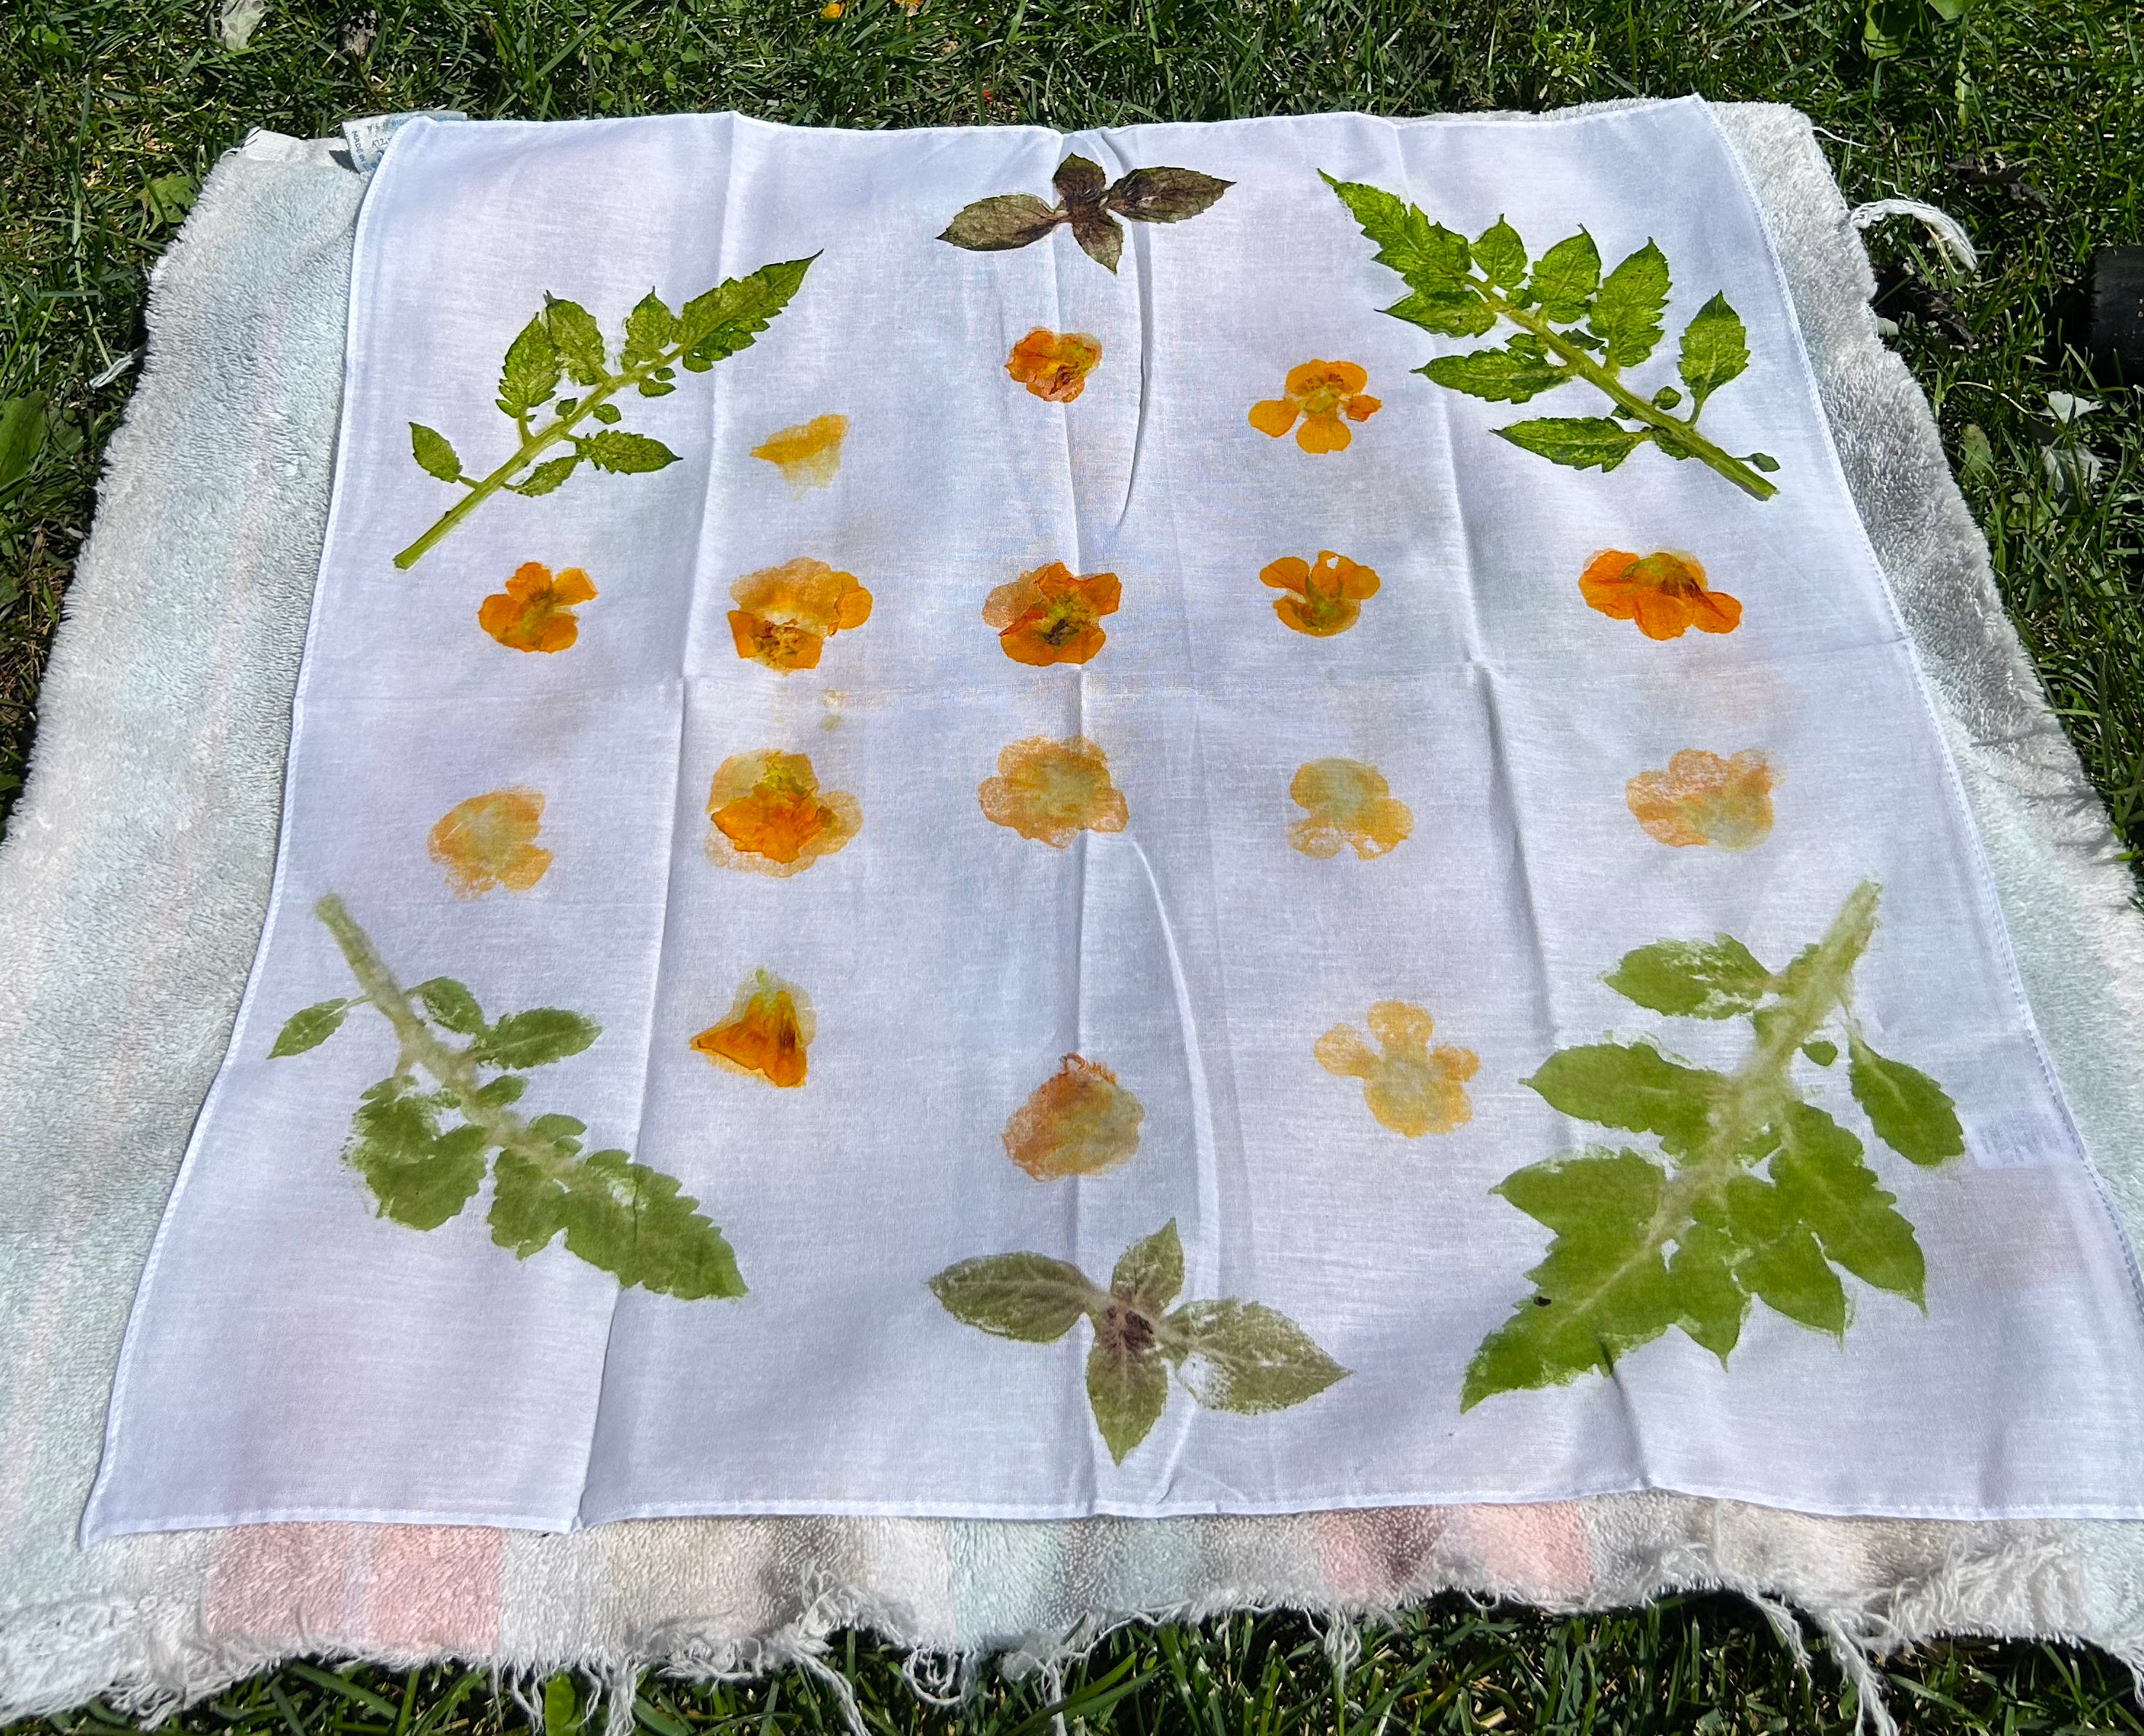
Step 3: Firmly hammer all around the rag, paying mind to where your plant cuttings lie underneath. Aim to hammer each flower/leaf cutting about 20-30 times, as firmly as possible. We are trying to get out all of the natural dyes we can!
Step 4: Remove rag slowly, making sure that everything has transferred. If it has not, repeat step 3 again.
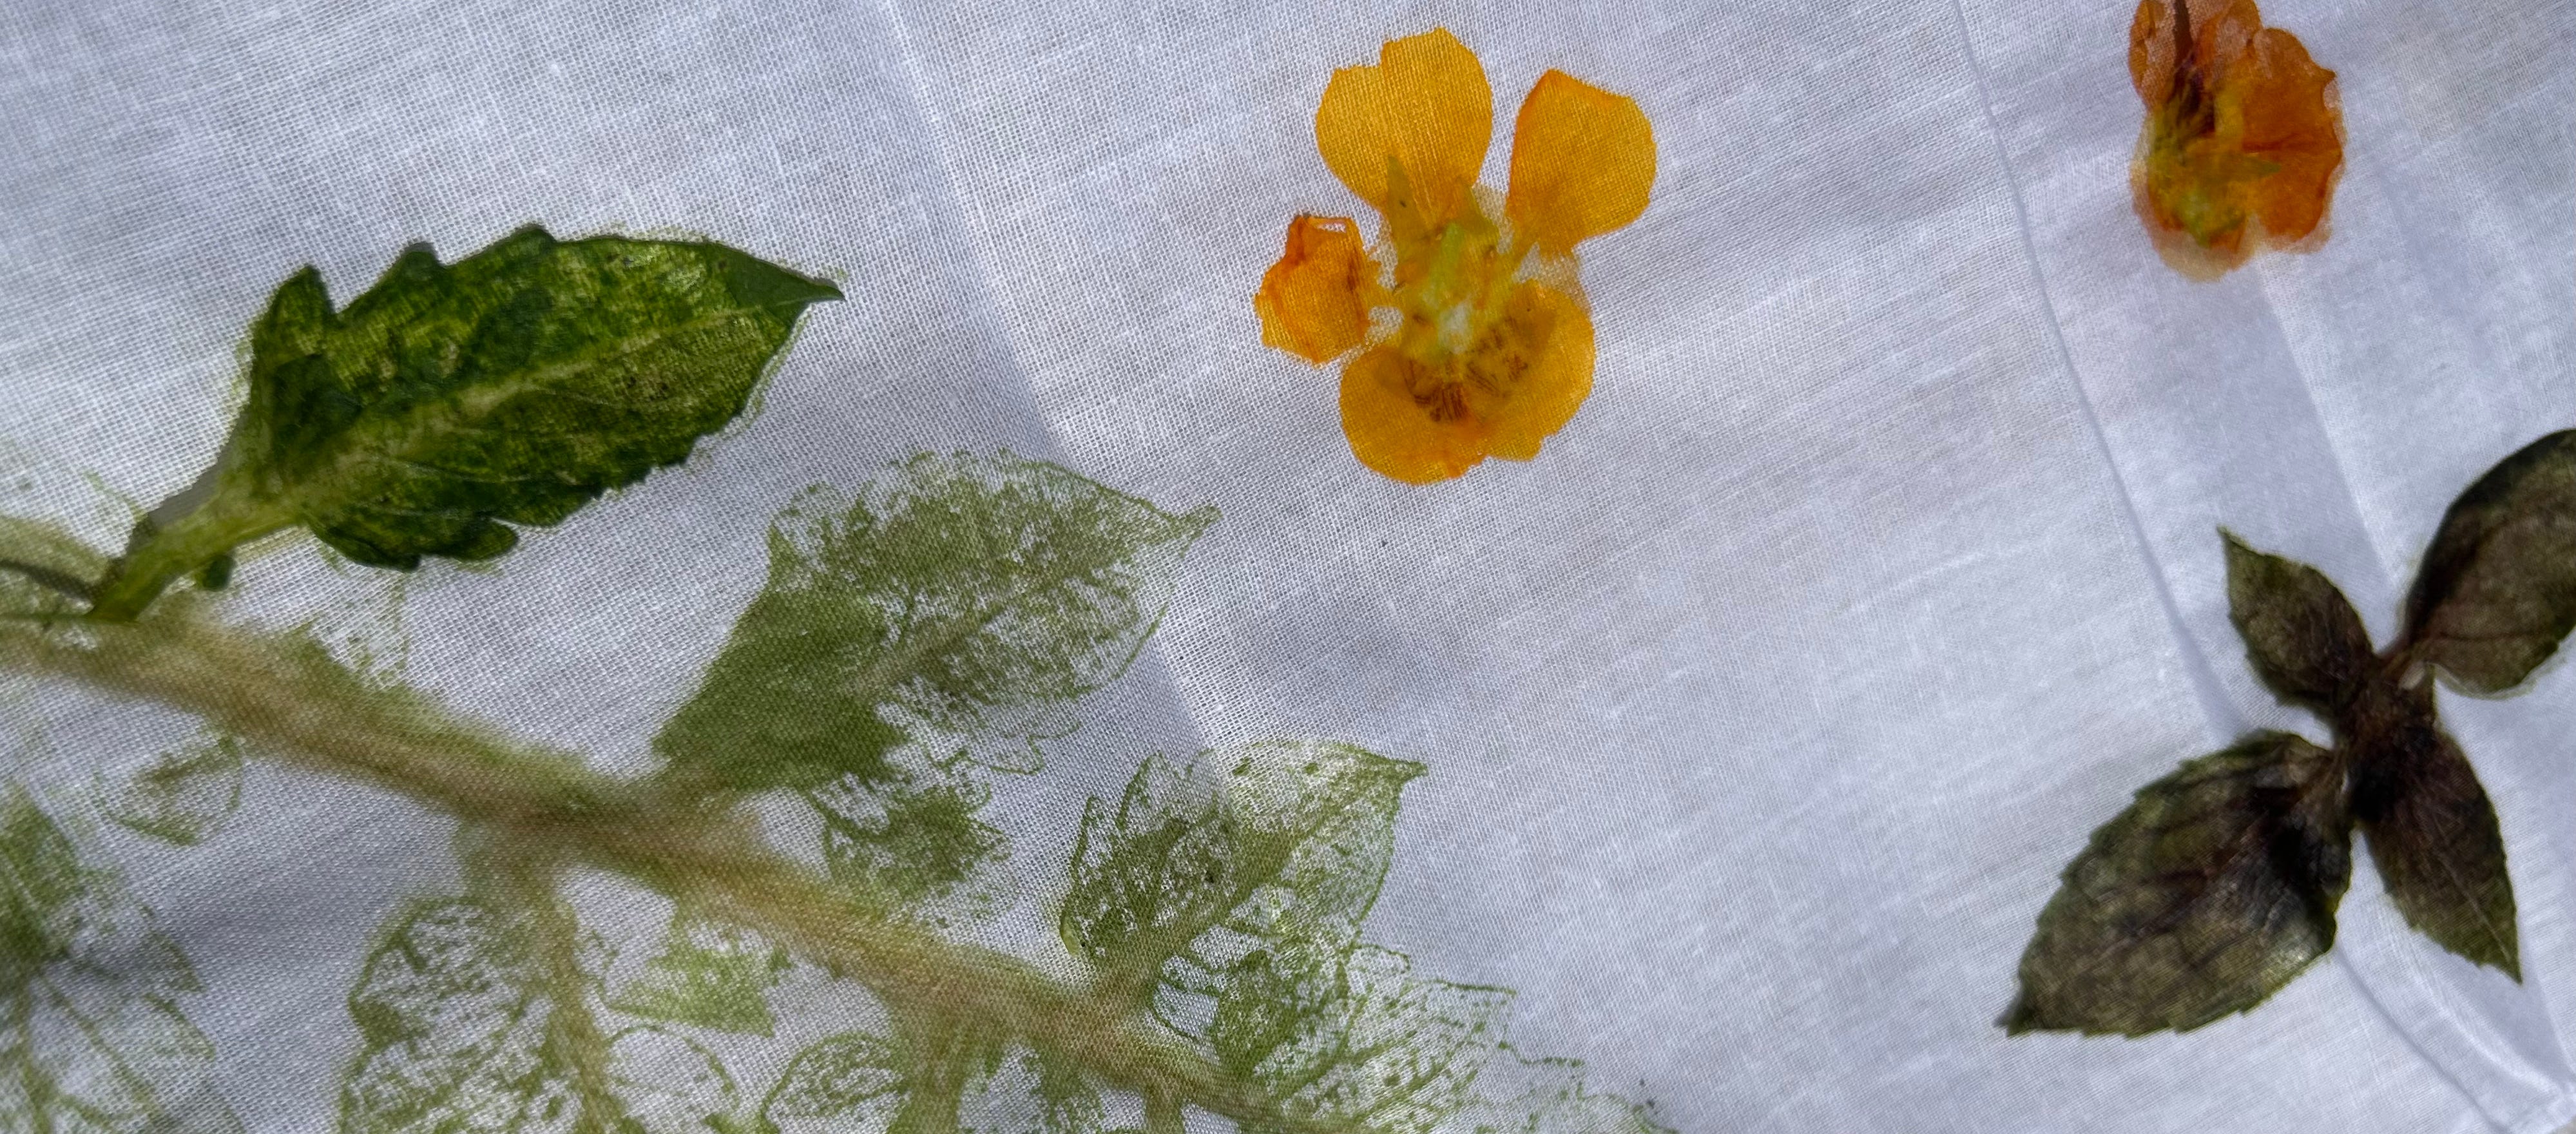
Step 5: Remove rag, pull of any plant debris left behind, and reveal your design!
I opted to use mine as a wall hanging, so I was not particularly worried about the colors being removed if it were to be washed. My best suggestion would be to perhaps use fabric Mod Podge over the pressings, although I have not tried this method.
We hope this has inspired you to get out and create something while the weather is still warm!
Talk soon!
-Clearline Magazine + Intern Katie J. Wensink